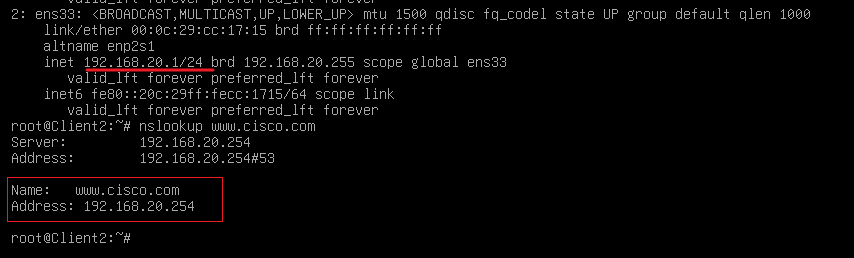
24-4-8 作业.note
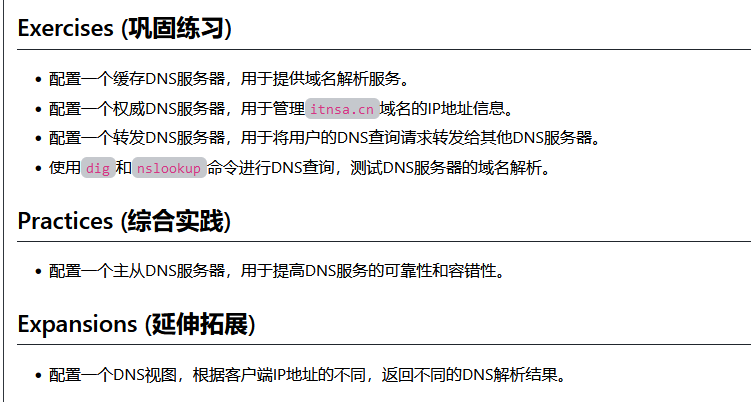
一、巩固练习:
1、配置 缓存DNS服务器(在隔离的网络下):
(1)先配置 一个权威的DNS服务器:
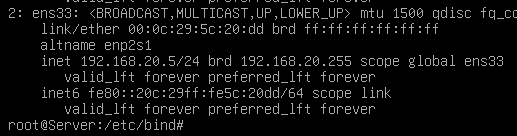
apt install -y bind9 bind9-utils dnsutils    //安装DNS服务器,及其它工具
echo "nameserver 127.0.0.1" > /etc/resolv.conf
vim /etc/bind/named.conf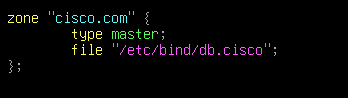
cd /etc/bind
cp db.local db.cisco
vim db.cisco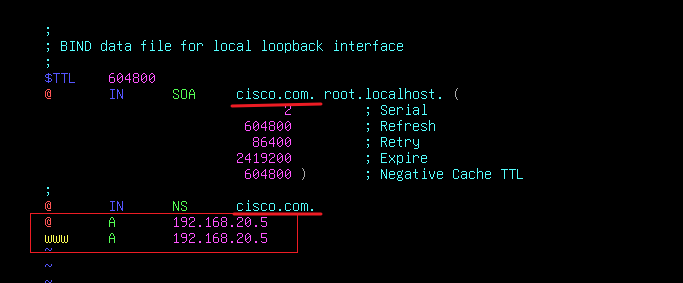
systemctl restart bind9(2)配置 缓存DNS服务器:
apt install -y bind9 bind9-utils dnsutils    //安装DNS服务器,及其它工具
echo "nameserver 192.168.20.5" > /etc/resolv.conf
vim /etc/bind/named.conf.options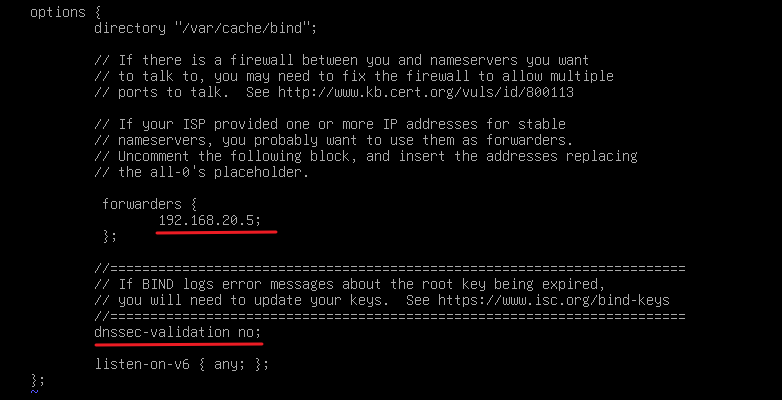
systemctl restart bind9(3)客户端访问:
1、先访问一次,然后 将 DNS权威服务器关机,只剩 DNS缓存服务器:
echo "nameserver 192.168.20.7" > /etc/resolv.conf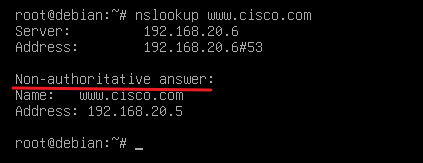
2、再次访问:
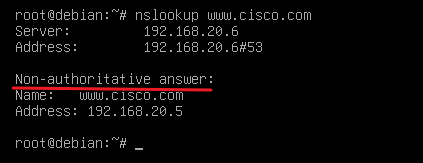
访问成功,但是这次是从 缓存中调用的
2、配置 权威 DNS服务器:
(1)配置 Server:
vim /etc/bind/named.conf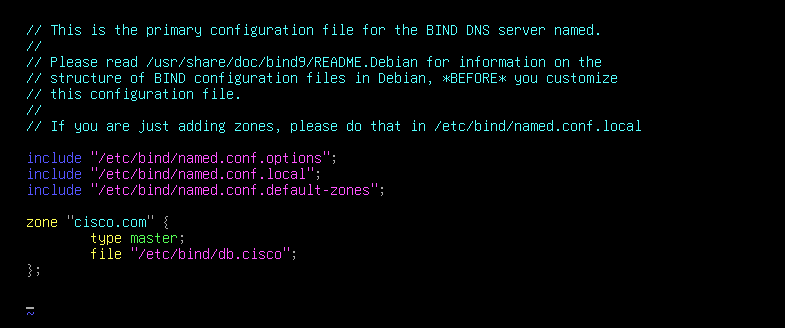
vim /etc/bind/db.cisco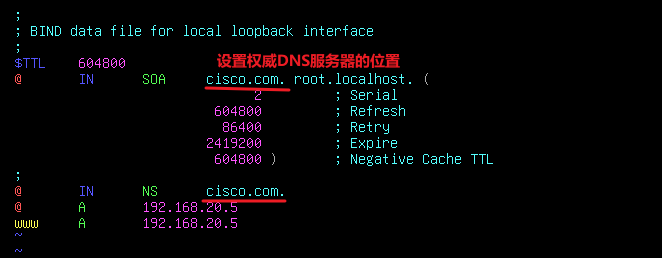
systemctl restart bind9(2)配置 Client:
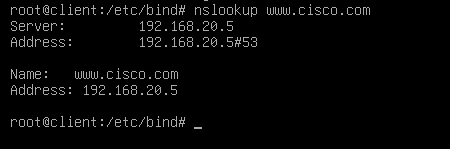
echo "nameserver 192.168.20.5" > /etc/resolv.conf没有提示非权威,就是权威
3、配置 转发 DNS服务器:
需要配置两台DNS服务器,一台主DNS服务器,一台转发DNS服务器,一台客户端
(1)配置 DNS服务器:
vim /etc/bind/named.conf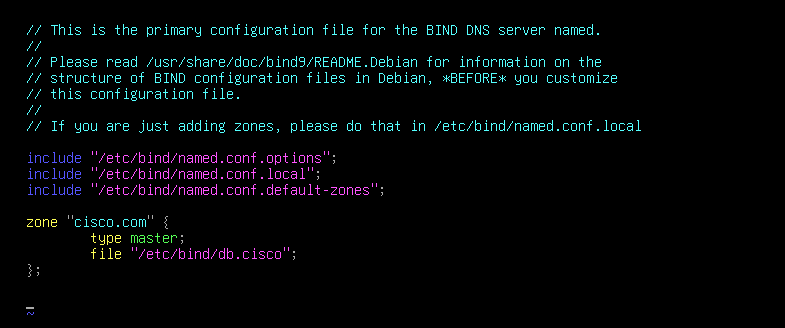
vim /etc/bind/db.cisco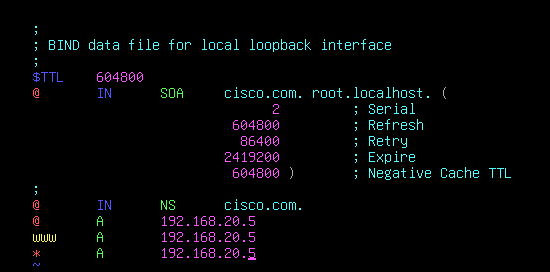
(2)配置 DNS转发:
echo "nameserver 192.168.20.6" > /etc/resolv.conf    //设置DNS服务器地址为本地
vim /etc/bind/named.conf.options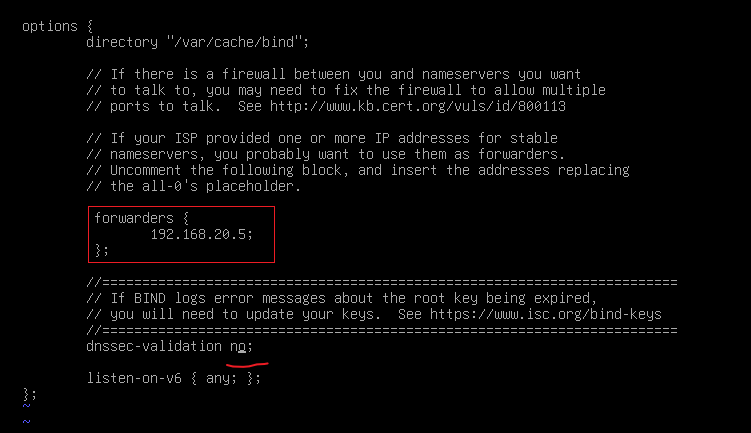
(3)配置 客户端:
echo "nameserver 192.168.20.6" > /etc/resolv.conf //设置 DNS服务器地址为 DNS转发服务器的地址(4)使用 dig、nslookup 进行DNS查询:
apt install -y dnsutils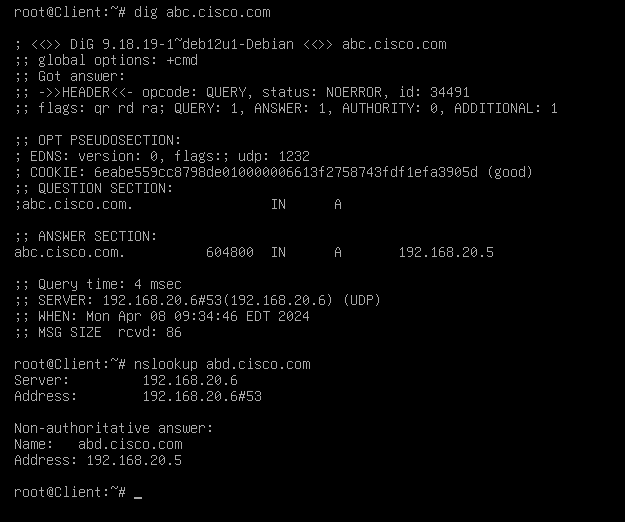
二、综合实践:

1、配置 DNS 主服务器:
apt install -y bind9 bind9-utils dnsutils
vim /etc/bind/named.conf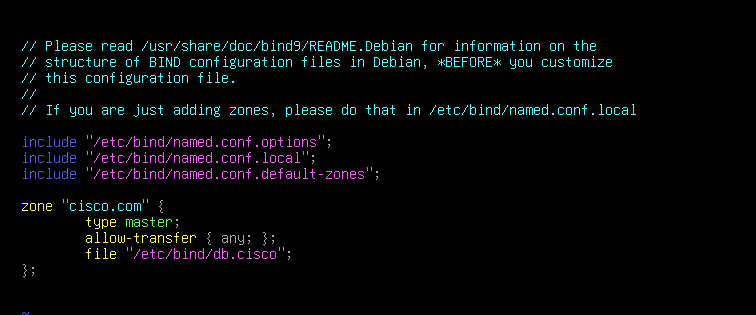
2、配置 DNS 从属服务器:
apt install -y bind9 bind9-utils dnsutils
vim /etc/bind/named.conf
# 默认会将区域配置文件以二进制形式存储到 /var/cache/bind目录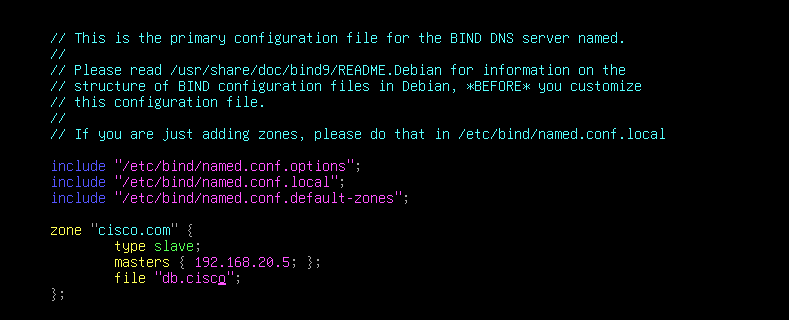
3、配置客户端:
cat > /etc/resolv.conf <<EOF
nameserver 192.168.20.5
nameserver 192.168.20.6
EOF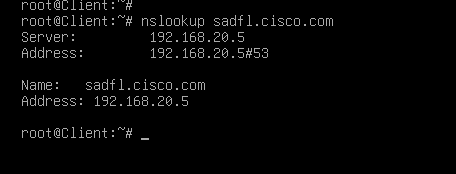
三、延申拓展:

配置 一台 DNS 服务器(两张网卡),两台 客户端(不同网段)1、配置 DNS服务器:
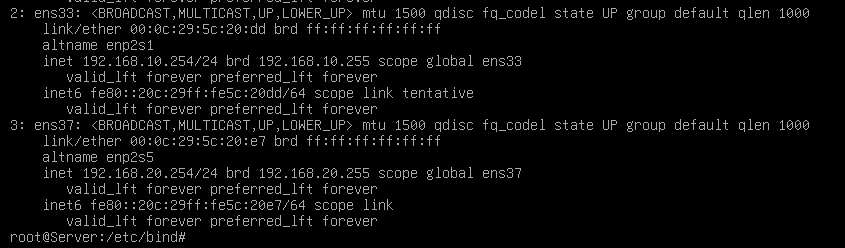
vim /etc/bind/named.conf.default-zones
# 注释掉该文件中的所有区域配置(因为 view外不允许存在区域配置)【当然,也可以将这些区域移动到view中,根据题目要求配置即可】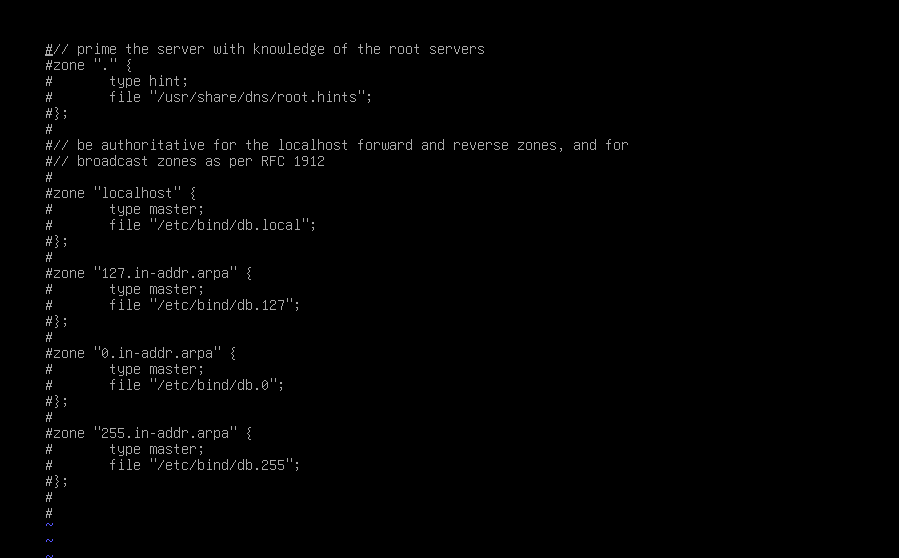
vim /etc/bind/named.conf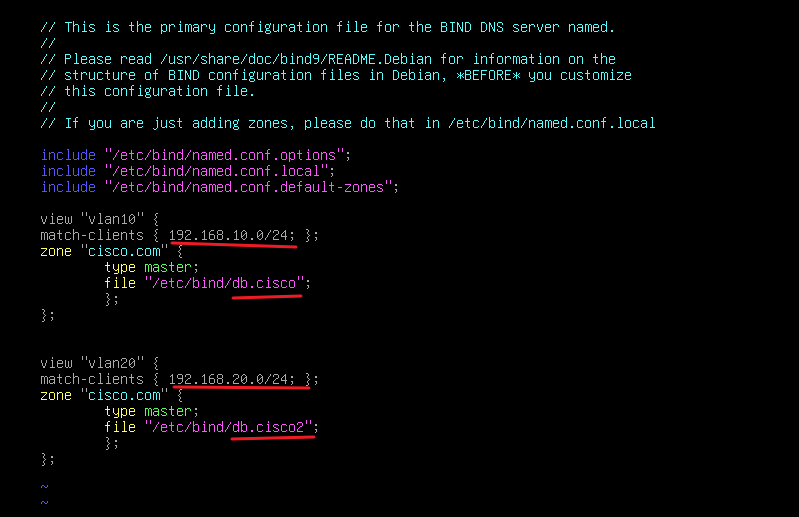
vim /etc/bind/db.cisco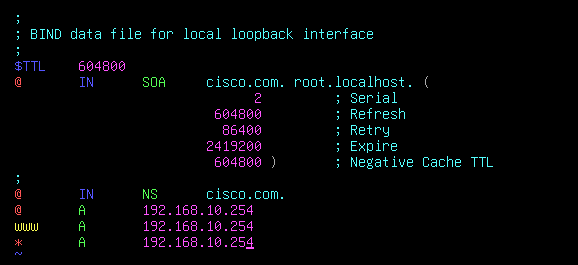
vim /etc/bind/db.cisco2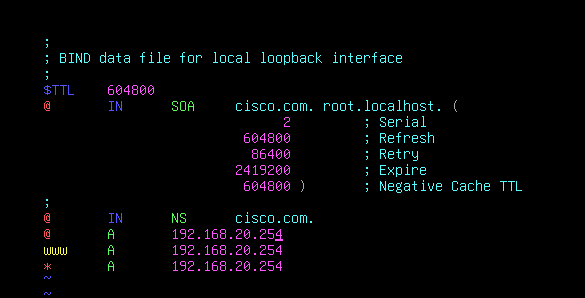
2、在 客户端上测试:
(1)Cilent1:
echo "nameserver 192.168.10.254" > /etc/resolv.conf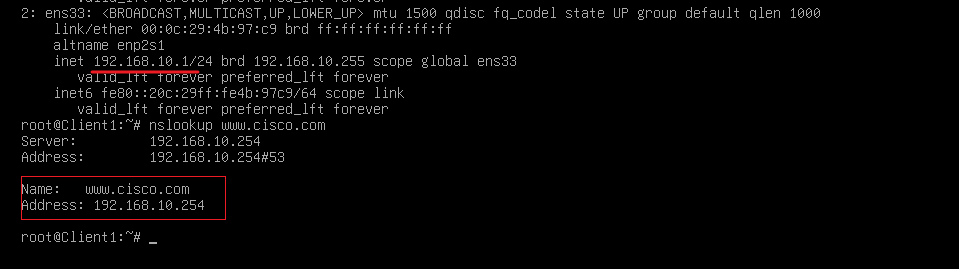
(2)Client2:
echo "nameserver 192.168.20.254" > /etc/resolv.conf