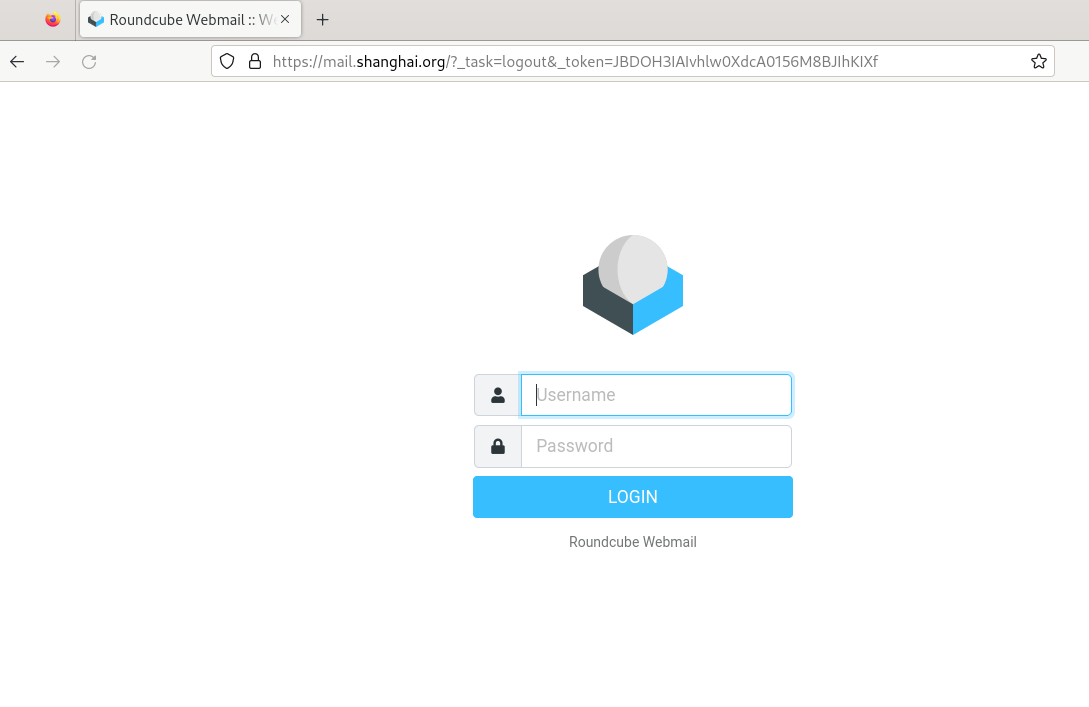
roundcube.note
·首先确保 Mail服务没有问题,能够正常收发邮件
一、配置 WebMail:
注意:下载了 roundcube 后,它会自动将 /run/php/php8.2-fpm.sock 文件的属组和所有者设置为 www-data ,如果题目没有要求更改进程用户和组,那么就不影响,如果题目有要求更改,那么Web服务器就会因为没有权限无法访问到 /run/php/php8.2-fpm.scok,而报错(502 Bad Gateway)
解决方法:将 /run/php 目录及其下文件的所有者更改为题目所要求的用户
chown -R [进程用户:组] /run/php
1、配置 Web:
在debian 13.3以后的版本中,web根路径只能用 /usr/share/roundcube,不要改它的web目录,因为它有的软连接是 ../../.. 这样指到 /usr/share/中的,改了路径会导致访问不到。
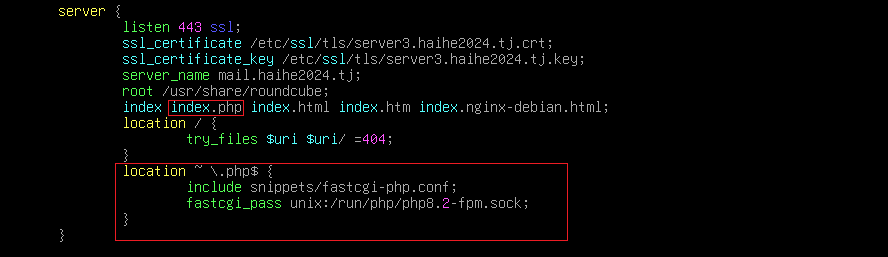
(1)nginx:
apt install -y nginx php8.2-fpmWeb 不需要额外配置,只需要能够正常接收 php
只是给客户端的访问提供一个网页,只需要将 /usr/share/roundcube 放到网站根目录即可,或者将 /usr/share/roundcube 设置为根目录都行
(2)apache2:
# apache2 比较简单:
## 也将根目录设置为 /usr/share/roundcube 即可
apt install -y apache2 php8.2-fpm
a2enmod php8.2
a2enconf php8.2-fpm.conf
a2enmod proxy_fcgi
2、配置 roundcube:
(1)安装 roundcube:
apt install -y mariadb-server
apt install -y roundcube安装时会配置 Mysql,按照提示输入密码即可
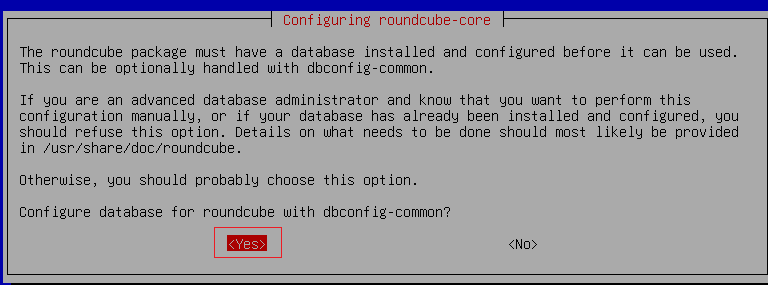
·安装时会提示是否配置 Mysql,选择 Yes:
·没有特殊要求,localhost 即可,也可以设置为 %:
只允许本机访问:
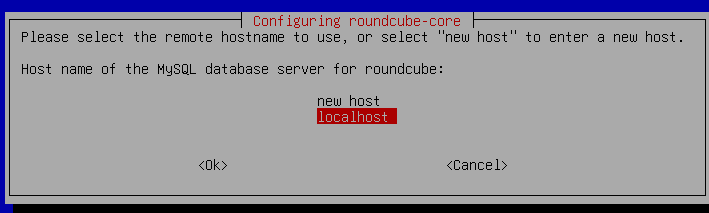
或允许所有地址:(当然后面也要在 /etc/mysql/mariadb.conf.d/50-server.cnf 中允许其它地址访问)
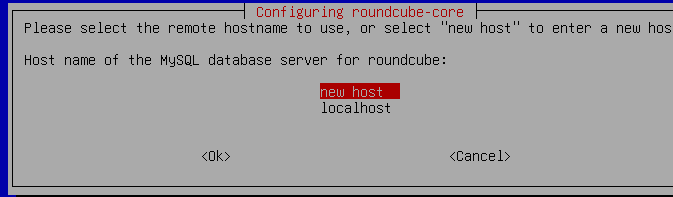
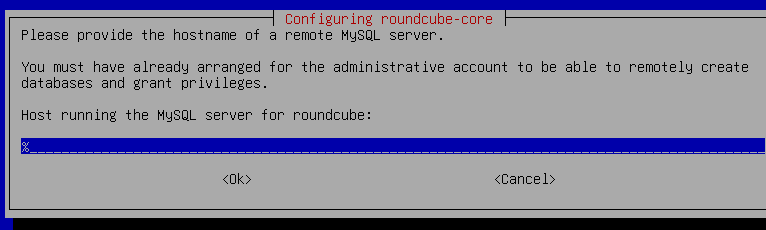
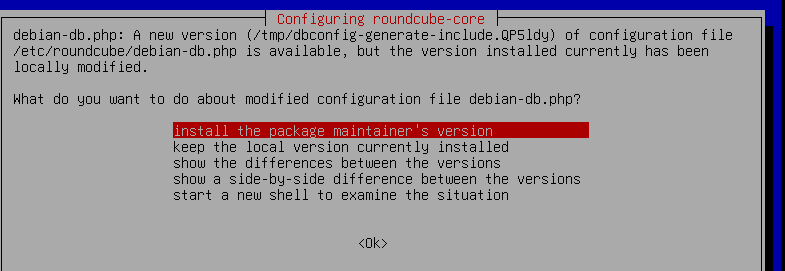
·选择第一个(如果没有弹出这个也不影响):
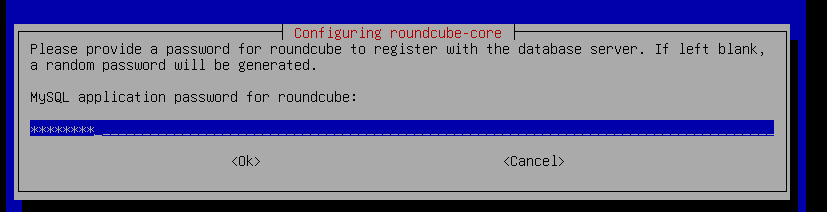
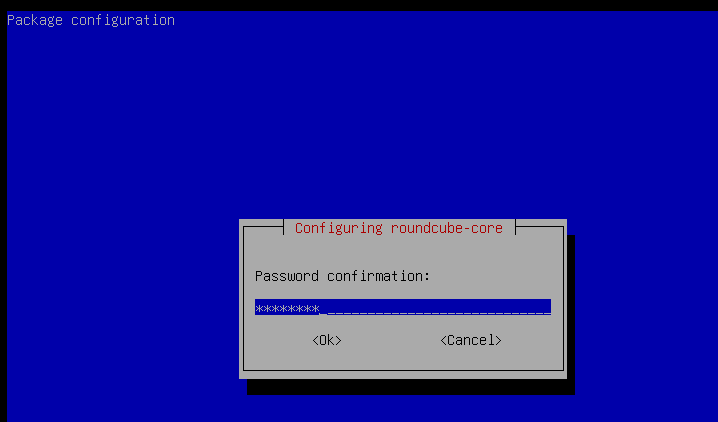
·然后会提示输入Mysql数据库的密码,自定义即可:
(2)编辑配置文件:
vim /etc/roundcube/config.inc.php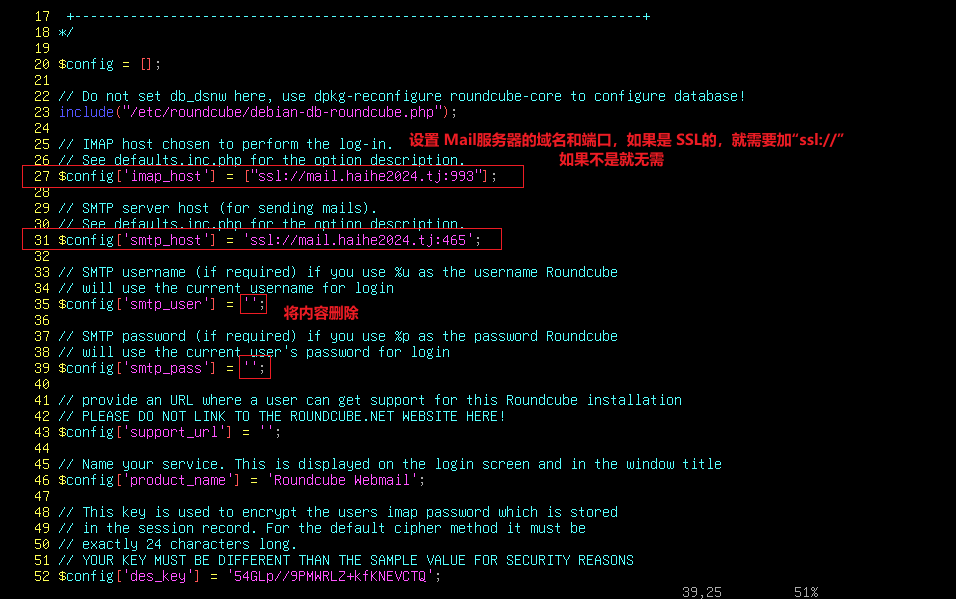
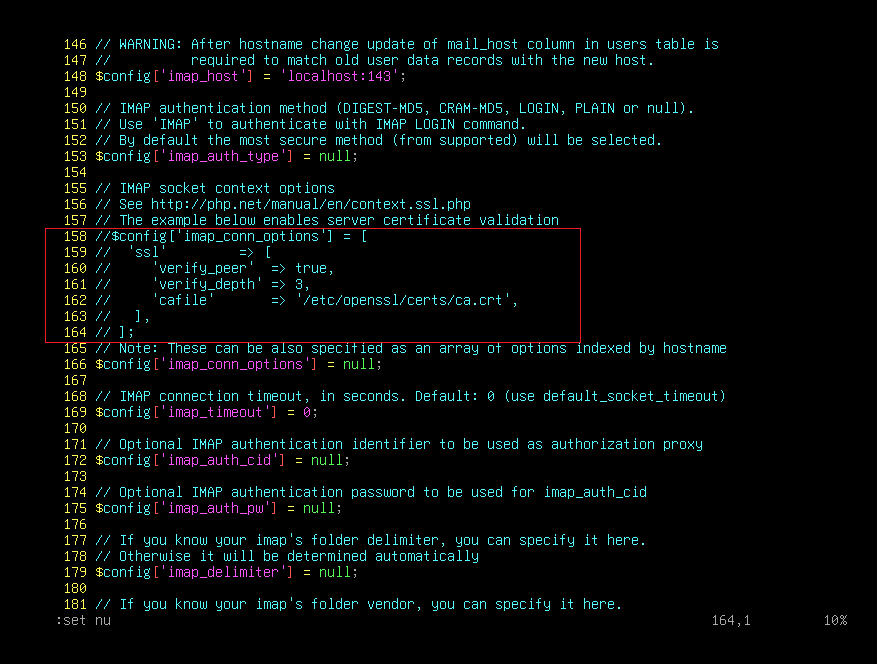
·复制 defaults.inc.php 文件中的内容:
·粘贴到 config.inc.php 文件中:
vim /etc/roundcube/config.inc.php
# 这个只需要在本地信任CA根证书 和 dovecot使用的SSL证书就不用添加了(前提是 27行和31行这两个域名 不会报证书 SSL的错误)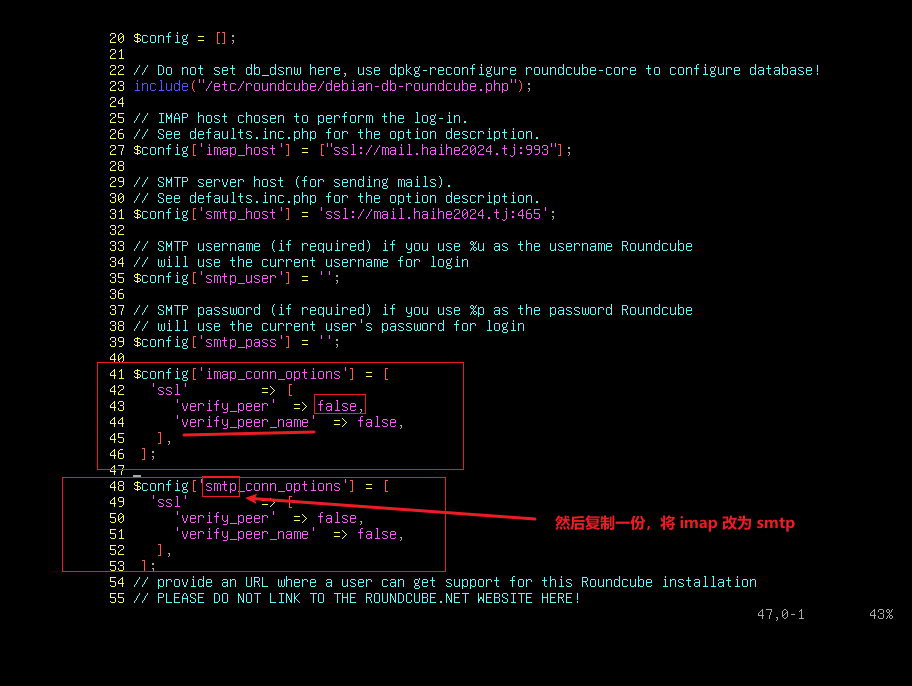
(3)(可选,有时是必选)修改 /run/php 目录的所有者 为 Web 服务器的进程用户和组:
如果题目有要求修改 Web服务的进程用户和组,那么就需要修改
如果题目没有要求,那么就无需修改
cd /run/php
chown -R [题目指定的用户和组] .
chown -R webuser:webuser .
3、删除 roundcube:
apt autoremove mariadb-server
apt purge -y mariadb-server
apt autoremove roundcube roundcube-core
apt purge -y roundcube roundcube-core
rm -rf /usr/share/roundcube /etc/roundcube
## 询问是否删除数据库,点击 Yes
## 询问是否删除数据库,点击 Yes
二、roundcube 和 mysql不在同一台机器:
1、roundcube(server1):
(1)安装 web 和 roundcube:
apt install -y mariadb-server
apt install -y roundcube
或者:
# 询问是否创建数据库,输入 no
apt install -y roundcube
2、mysql(server2):
(1)配置 mysql:
两种方法:
1、安装 mysql后,再安装roundcube让其自动配置数据库(这里不能手动创建roundcube数据库,否则安装会报错)
2、安装 mysql后,手动创建数据库、用户(但是roundcube中的表项等值不会自动创建),我们将roundcube机器上的初始化数据库拷贝过来执行即可
方式一快捷,方式二自由度高
方式一:自动配置roundcube数据库:
会自动创建roundcube数据库和数据库用户
apt install -y mariadb-server
apt install -y roundcube
vim /etc/mysql/mariadb.conf.d/50-server.cnf
systemctl restart mysql
自动创建的roundcube用户默认仅允许 localhost访问,因此需要更改用户的权限:
grant all privileges on roundcube.* to 'roundcube'@'%' identified by 'Skills39';
quit
systemctl restart mysql
方式二:手动创建数据库,手动创建用户,调用roundcube脚本初始化数据库:
这个方式更为自由,可以自由的选择创建 数据库名称、用户名称,不会像方式一一样数据库名称和用户名称都是固定为roundcube(虽然能改,但是麻烦)
apt install -y mariadb-server
mysql
create database webmail;
grant all privileges on webmail.* to 'mailuser'@'%' identified by 'Skills39';
quit
systemctl restart mysql
vim /etc/mysql/mariadb.conf.d/50-server.cnf
systemctl restart mysql
# 将 roundcube的初始化文件拷贝过来:
scp root@172.16.1.1:/usr/share/roundcube/SQL/mysql.initial.sql .
mysql webmail < mysql.initial.sql
# 如果root有密码:
mysql -uroot -pSkills39 webmail < mysql.initial.sql
3、编辑 roundcube配置文件(server1):
其它配置不赘述
vim /etc/roundcube/debian-db.php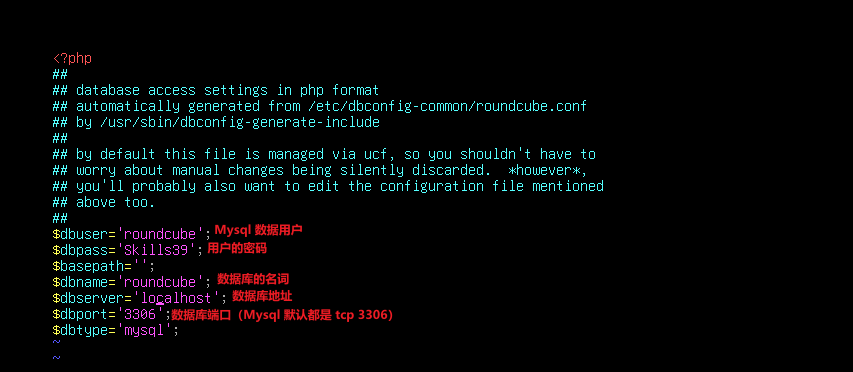
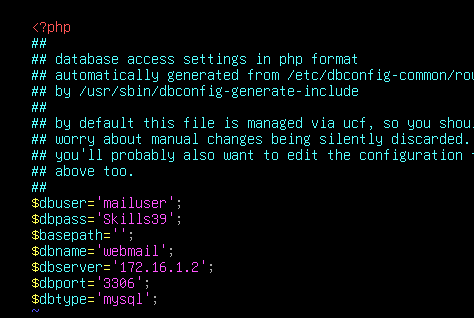
·客户端访问: