mariadb 基础配置.note
·要在 远程服务器上访问 Mysql,需要编辑 Mysql 文件(因为Mysql默认只支持 localhost 访问):
vim /etc/mysql/mariadb.conf.d/50-server.cnf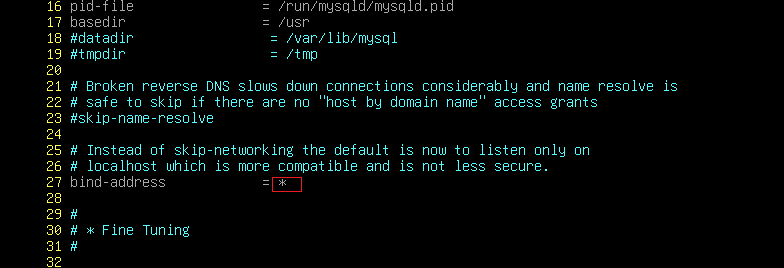
systemctl restart mysql一、配置 Mysql:
apt install -y mariadb-server1、配置 一个简单可用的 mysql:
# 语法:
create database [要创建的数据库名称];    //创建数据库
grant all privileges on [刚刚创建的数据库].* to '[用户]'@'%' identified by '[用户的密码]';    //这个用户无需在Linux上本地存在(可以是不存在的用户)
flush privileges;    //完成配置
exit;

# 示例:
create database wordpress;
grant all privileges on wordpress.* to 'admin'@'172.16.1.101' identified by 'Skills39';
flush privileges;
exit
# 参数解释:
% //允许来自所有地址的流量连接 Mysql
localhost //仅允许本地连接 Mysql
## 也可以直接指定 IP 地址。2、天津题目:
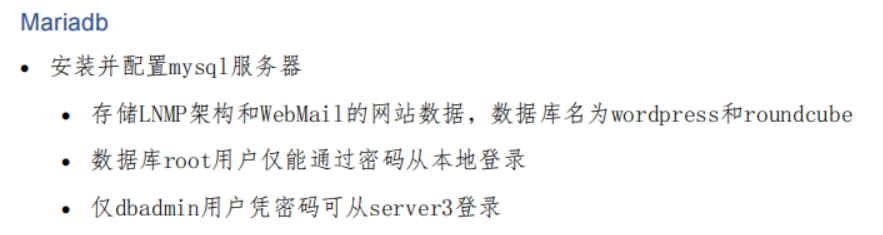
create database wordpress;
create database roundcube;
grant all privileges on wordpress.* to 'root'@'localhost' identified by 'Skills39';
grant all privileges on roundcube.* to 'root'@'localhost' identified by 'Skills39';
grant all privileges on wordpress.* to 'dbadmin'@'172.16.1.101' identified by 'Skills39';    //填写允许访问的地址
grant all privileges on roundcube.* to 'dbadmin'@'172.16.1.101' identified by 'Skills39';
flush privileges;
exit;
二、查看(不进入mysql,直接在shell执行mysql命令):
mysql -uroot -pSkills39 -hlocalhost -e "select user,host from mysql.user;"
mysql -uroot -pSkills39 -hlocalhost -e "show databases;"
# 如果mysql是在本地,-h 也可以不写