配置 基础 http + https 页面.note
一、配置 Apache2:
1、配置:
apt install -y apache2
a2enmod ssl
cd /etc/apache2/sites-available/
cp 000-default.conf 001-web.conf
2、修改网站根目录:
mkdir /cisco
chmod -R 777 /cisco
vim 001-web.conf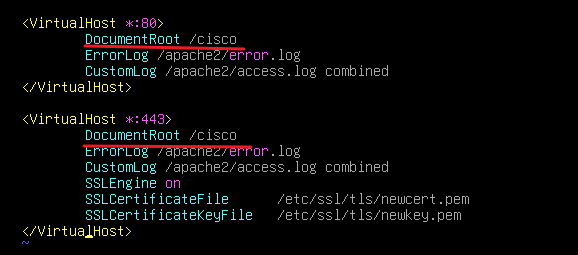
vim /etc/apache2/apache2.conf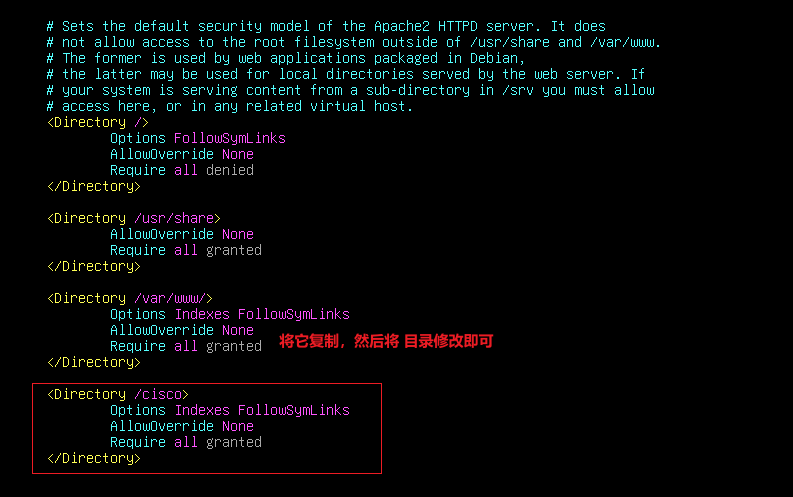
3、修改 访问日志文件路径 和 错误日志文件路径:
mkdir /apache2
touch /apache2/error.log
touch /apache2/access.log
chmod -R 777 /apache2
vim 001-web.conf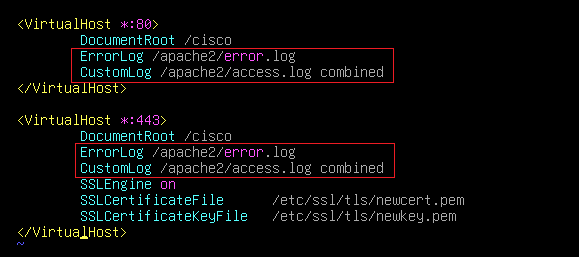
4、配置 https:
(1)创建自签名证书:
# 正常创建证书:
openssl req -new -x509 -nodes -out /etc/ssl/cisco.crt -keyout /etc/ssl/cisco.key

# 如果要创建可供Windows使用的证书:
openssl req -new -x509 -nodes -out /etc/ssl/cisco.crt -keyout /etc/ssl/cisco.key -subj "/CN=www.cisco.com" -addext "subjectAltName=DNS:www.cisco.com"
(2)创建 CA根证书颁发机构:
/usr/lib/ssl/misc/CA.pl -newca    //创建根CA证书颁发机构

# 可选,可以在 /etc/ssl/openssl.cnf 中添加证书扩展字段:
vim /etc/ssl/opnessl.cnf
/usr/lib/ssl/misc/CA.pl -newreq-nodes    //创建新的证书申请
/usr/lib/ssl/misc/CA.pl -sign    //签发证书

# 将证书移动到指定的位置
mkdir /etc/ssl/tls
rm newreq.pem    //证书申请可以直接删除
mv newcert.pem /etc/ssl/tls
mv newkey.pem /etc/ssl/tls
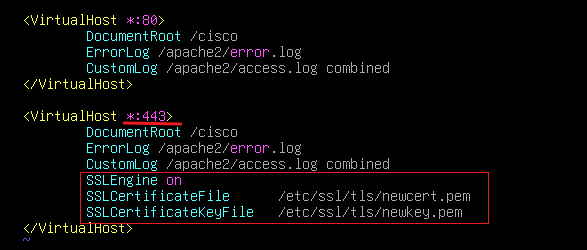
(3)配置 https:
vim 001-web.conf